How to Convert Images to Webp on Mac in 1 Second

When it comes to optimizing web images for performance, Webp format has gained significant popularity due to its efficient compression and superior image quality. For Mac users seeking a fast and reliable solution to convert images to Webp, Webp emerges as an excellent choice.
This article explores the seamless integration of Webp into macOS, providing users with a powerful tool for converting images while maintaining optimal performance.
Webp is a versatile command-line tool that enables Mac users to effortlessly convert various image formats to Webp, taking advantage of its smaller file sizes without compromising visual fidelity.
By integrating this tool into your workflow, you can achieve faster web page load times, reduced bandwidth consumption, and improved overall user experience. Let’s delve into the steps to set up and utilize Webp for swift Webp transformations on macOS.
reparation
You need to install Homebrew, a package manager for Mac OS. Please refer to the following page to install Homebrew, and then open the Terminal app and execute the following command to install Webp.
brew install webpIf Webp has been successfully installed, you need to create a quick operation command using the CLI program to convert PNG or JPG image files to Webp format. This will allow you to use it directly from the context menu for convenient use.
Creating Quick Actions for Webp Image Conversion
We will create a context menu by using the Webp CLI program installed with Homebrew to convert image files such as PNG and JPEG to the Webp format.
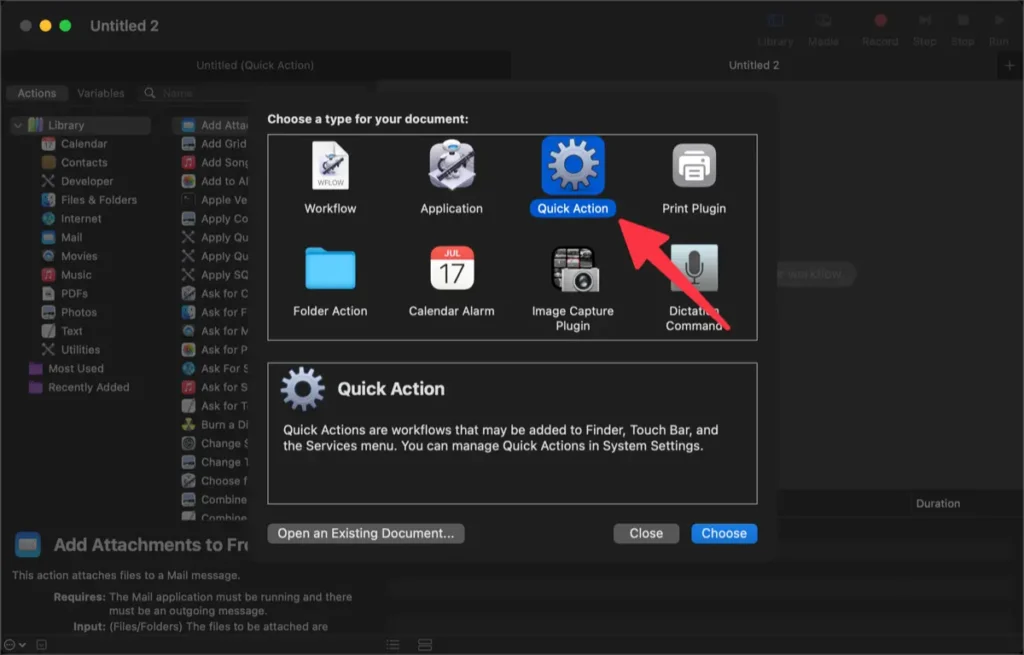
①. To make it work faster on Mac, open the Automator app and select Quick Action.
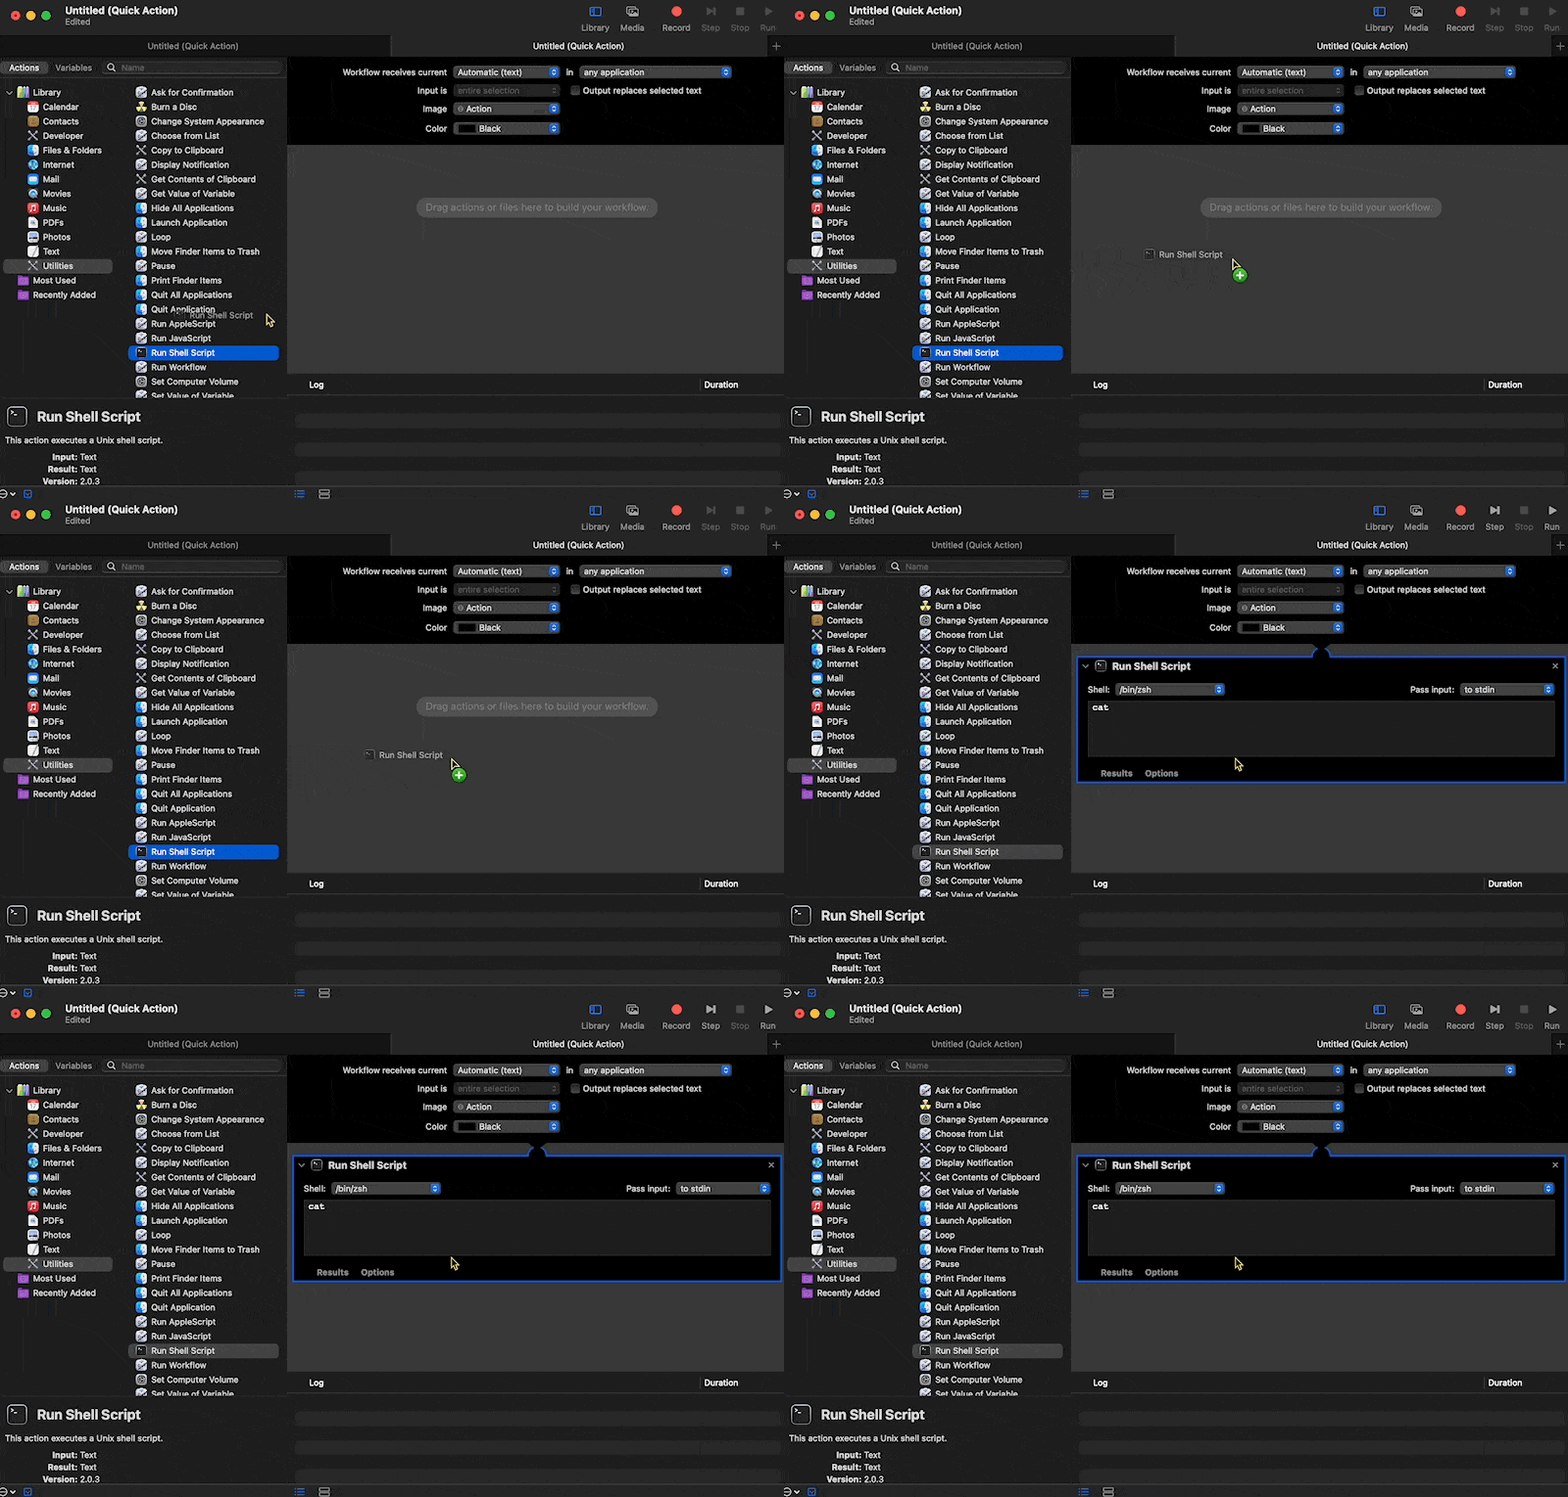
②. Add the Run Shell Script action found in the Utilities category of the Library.
③. Fill in the content as shown in the image below.
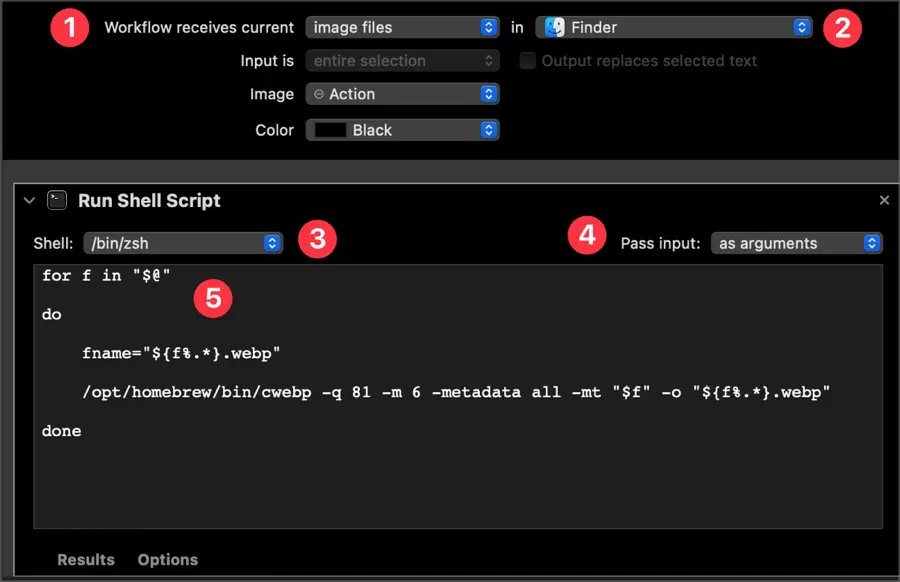
- Set “Workflow receives current” to “image files”.
- Set the application to “Finder”.
- Shell: /bin/zsh
- Pass input: as arguments
- Next, enter the following script.
for f in "$@"

do
fname="${f%.*}.webp"

/opt/homebrew/bin/cwebp -q 81 -m 6 -metadata all -mt "$f" -o "${f%.*}.webp"

done
④. Once you have finished writing the script, press ⌘ + S and enter a suitable name to save it. I saved the name of this menu as “Convert Webp”.
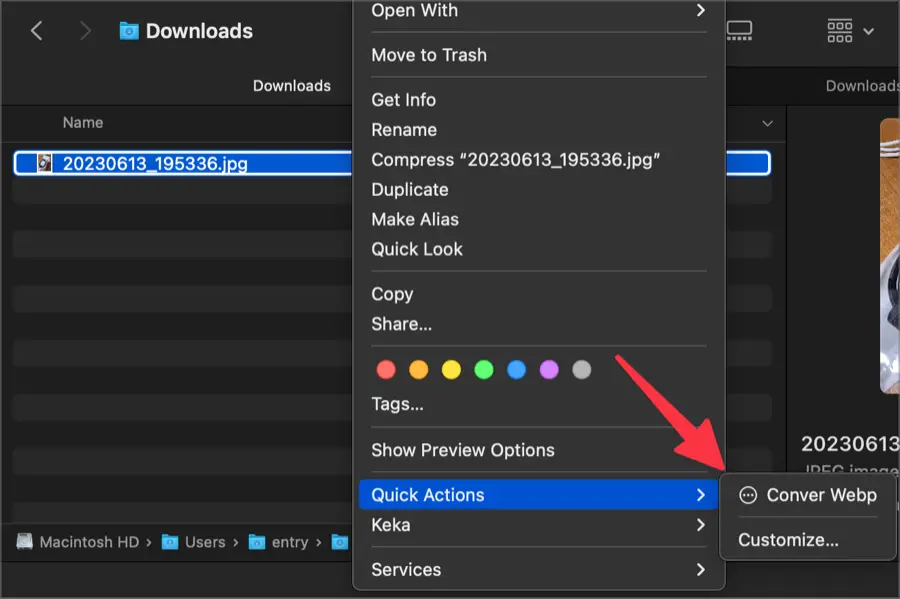
⑤. Right-click on an image file to verify if it is successfully converted to Webp format.
Changing Webp File Conversion Options
You can modify some parts of the code written to convert images to the Webp image file format, allowing users to optimize Webp images themselves.
-q 81 -m 6 -metadata all -mtThis value is a setting I have personally determined through multiple tests, minimizing image quality while maximizing compression ratio.
This part can be modified by users as desired. You can refer to the documentation provided by Google below to configure it according to your preferences.
🌐 cwebp | WebP | Google for Developers
Convert images to Webp with keyboard shortcut
Converting images to Webp format using the context menu by right-clicking is convenient, but assigning a keyboard shortcut can allow even faster image conversion.
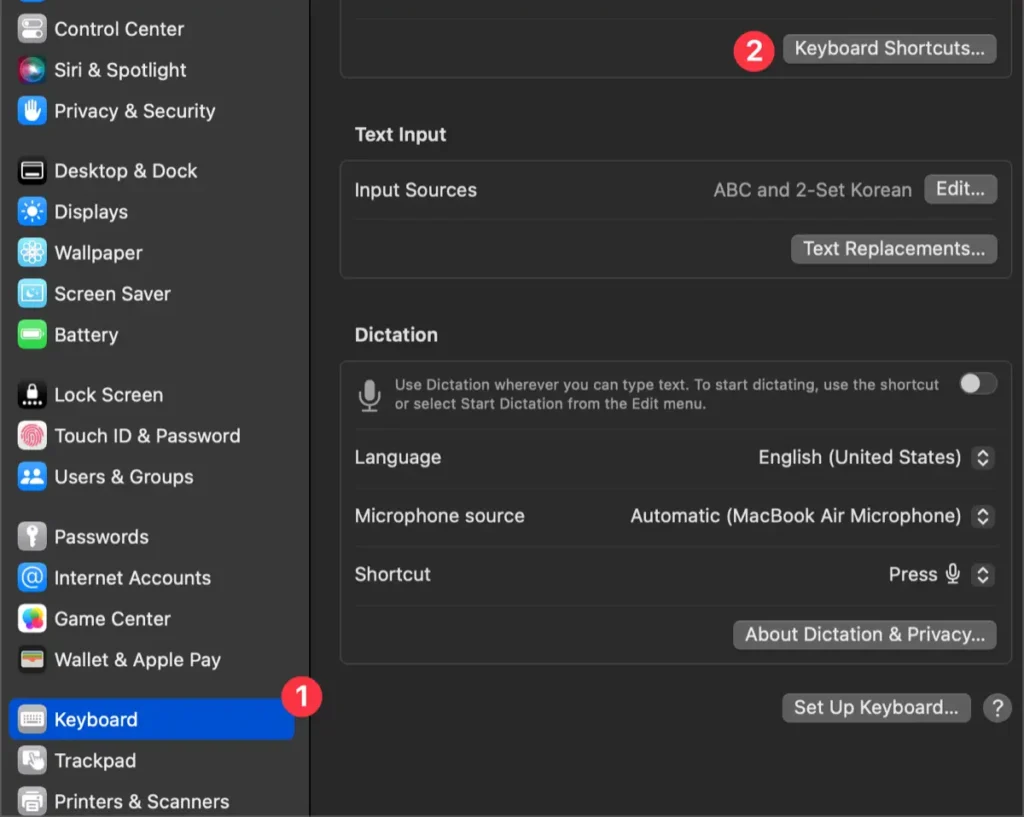
Select the ‘Keyboard’ menu in the System Settings sidebar and click on the Keyboard Shortcuts button.
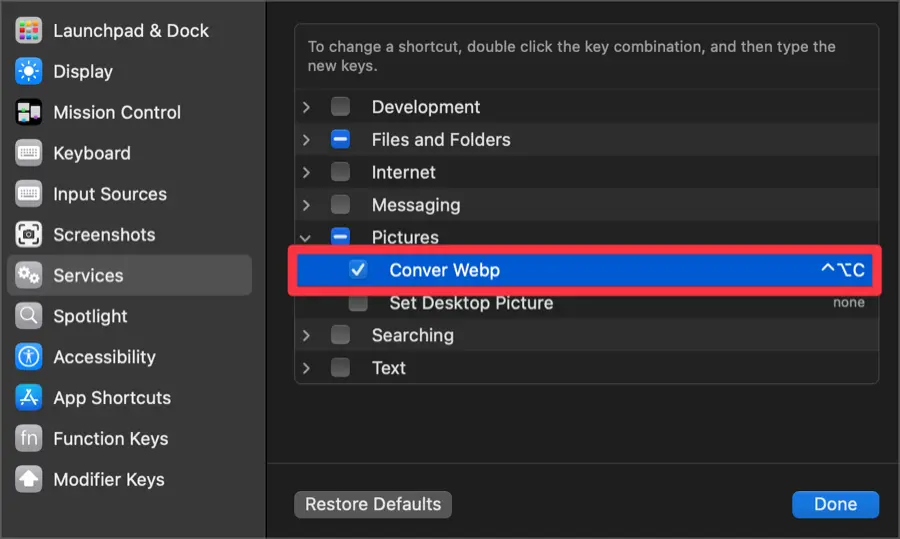
Choose ‘Services’ among the items displayed in the sidebar and assign a shortcut for the [Convert Webp] action found in ‘Pictures’.
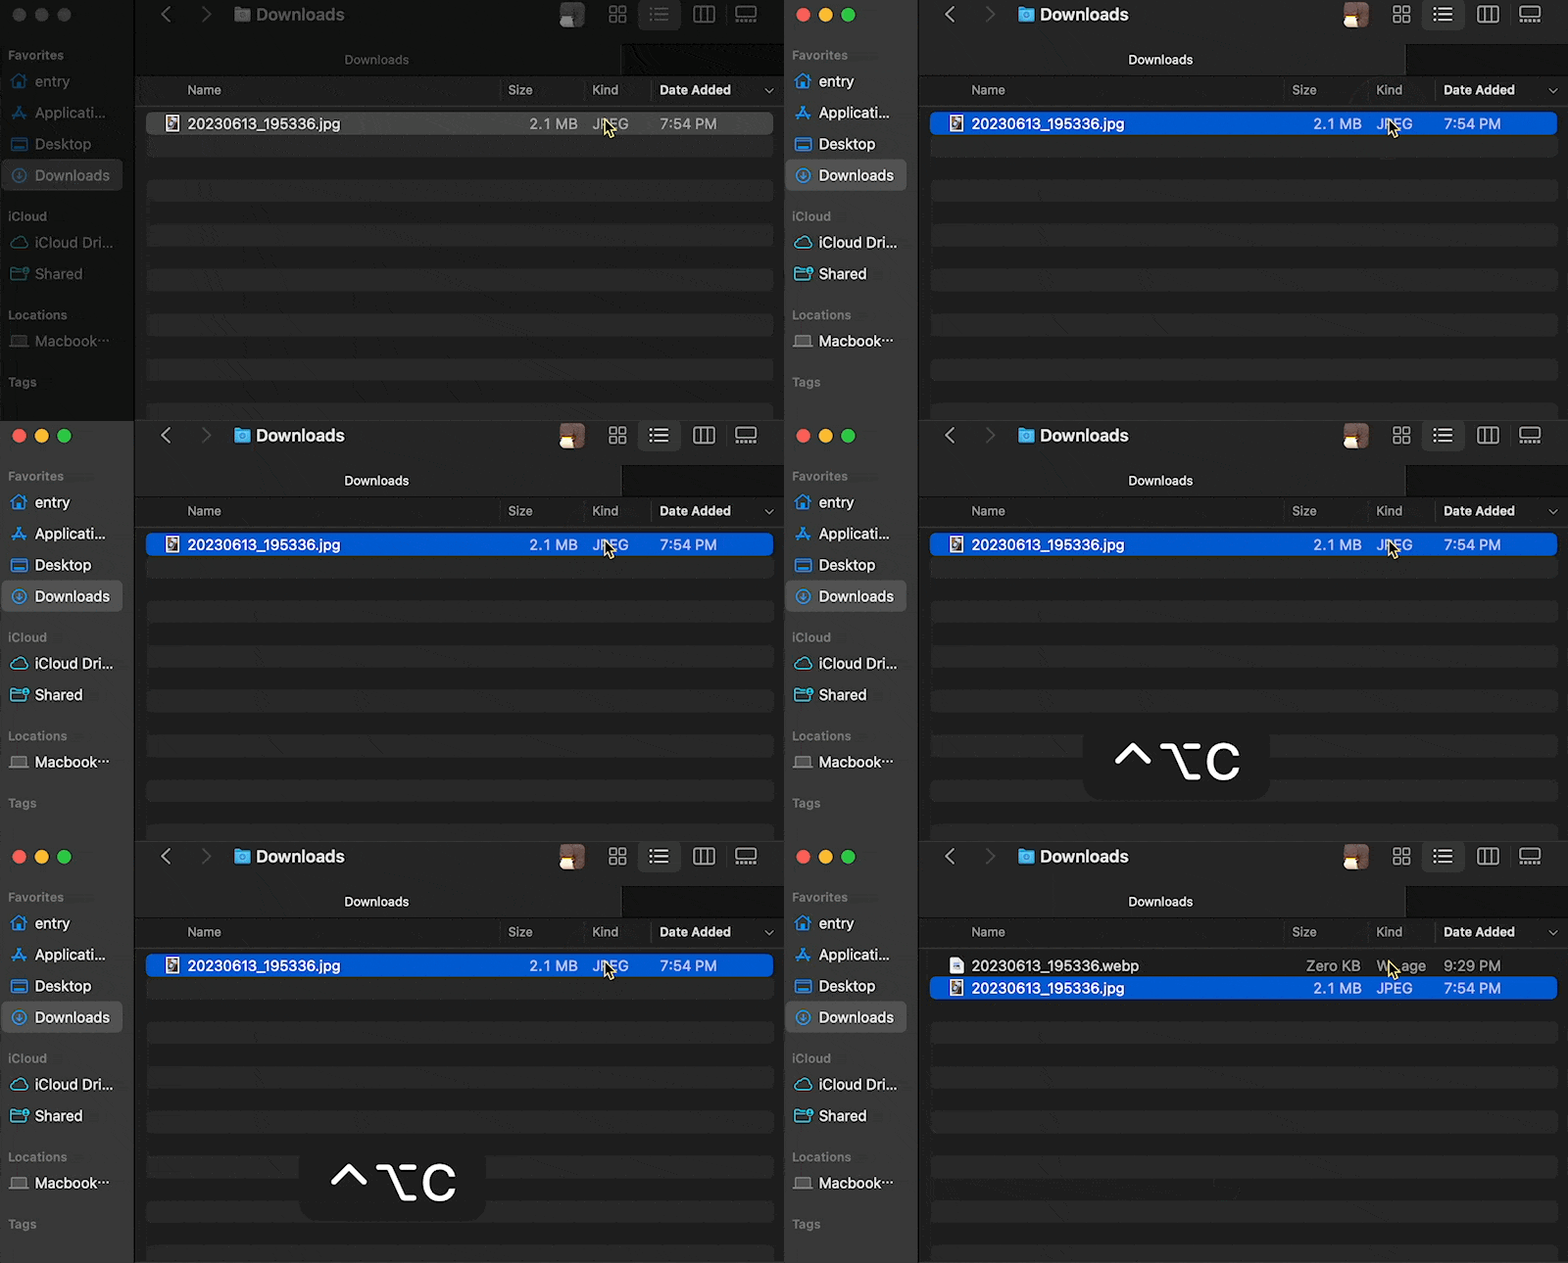
Now, you can quickly convert selected images to Webp format using the assigned keyboard shortcut. You can also select multiple images for batch conversion.
You can add a context menu to convert image files to WebP images using Automator and scripts. If you’re new to Automator, it might seem challenging or overwhelming, but if you follow this tutorial, you’ll find that it’s not too difficult.