How to Customize the Finder toolbar on Mac

The Finder toolbar on Mac provides quick access to commonly used features and shortcuts, allowing for efficient file exploration and management. However, the default toolbar may not include all the necessary tools.
Fortunately, on Macs running Ventura or newer versions, you can easily customize the toolbar by adding or removing buttons to suit your preferences. In this guide, we will walk you through customizing the Finder toolbar on a Mac, enabling you to optimize it according to your specific workflow.
Adding Mac’s Default Tools to the Finder Toolbar
Default settings of the Finder toolbar
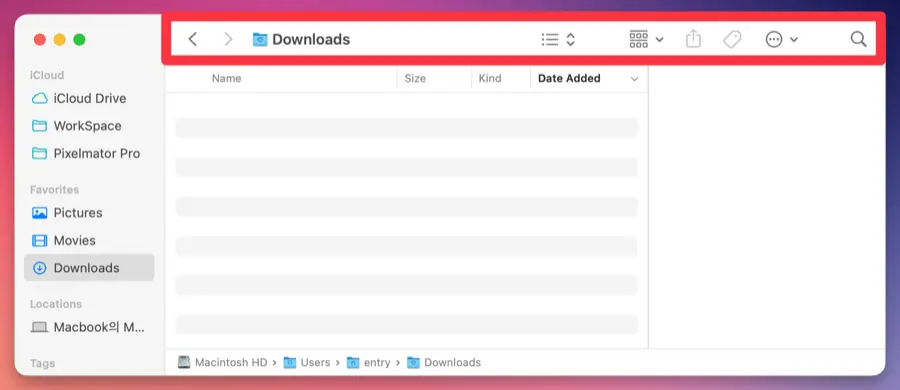
On Macs running Ventura or newer versions, the Finder toolbar comes with default settings that include features like Go Back, Go Forward, Folder Name, File View Type, Grouping, Sorting, and Search.
Customize toolbar option
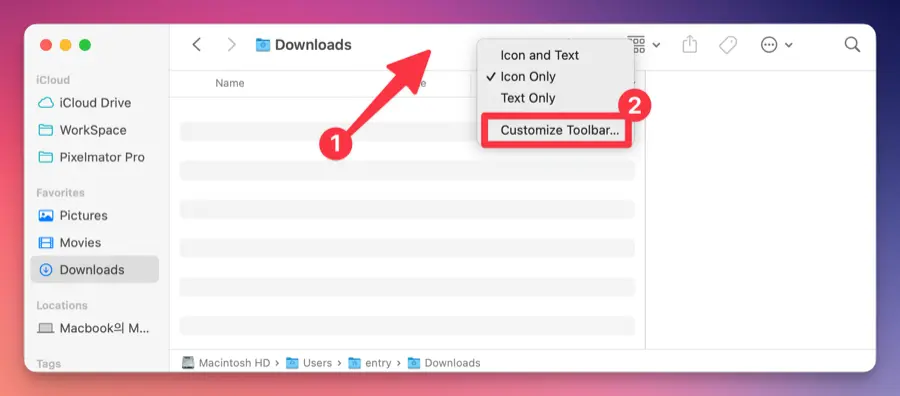
To customize the toolbar, launch Finder and click on View > Customize toolbar... in the menu bar at the top-left corner. Alternatively, right-click on the toolbar in Finder and select Customize toolbar... from the context menu.
Add tools to the toolbar
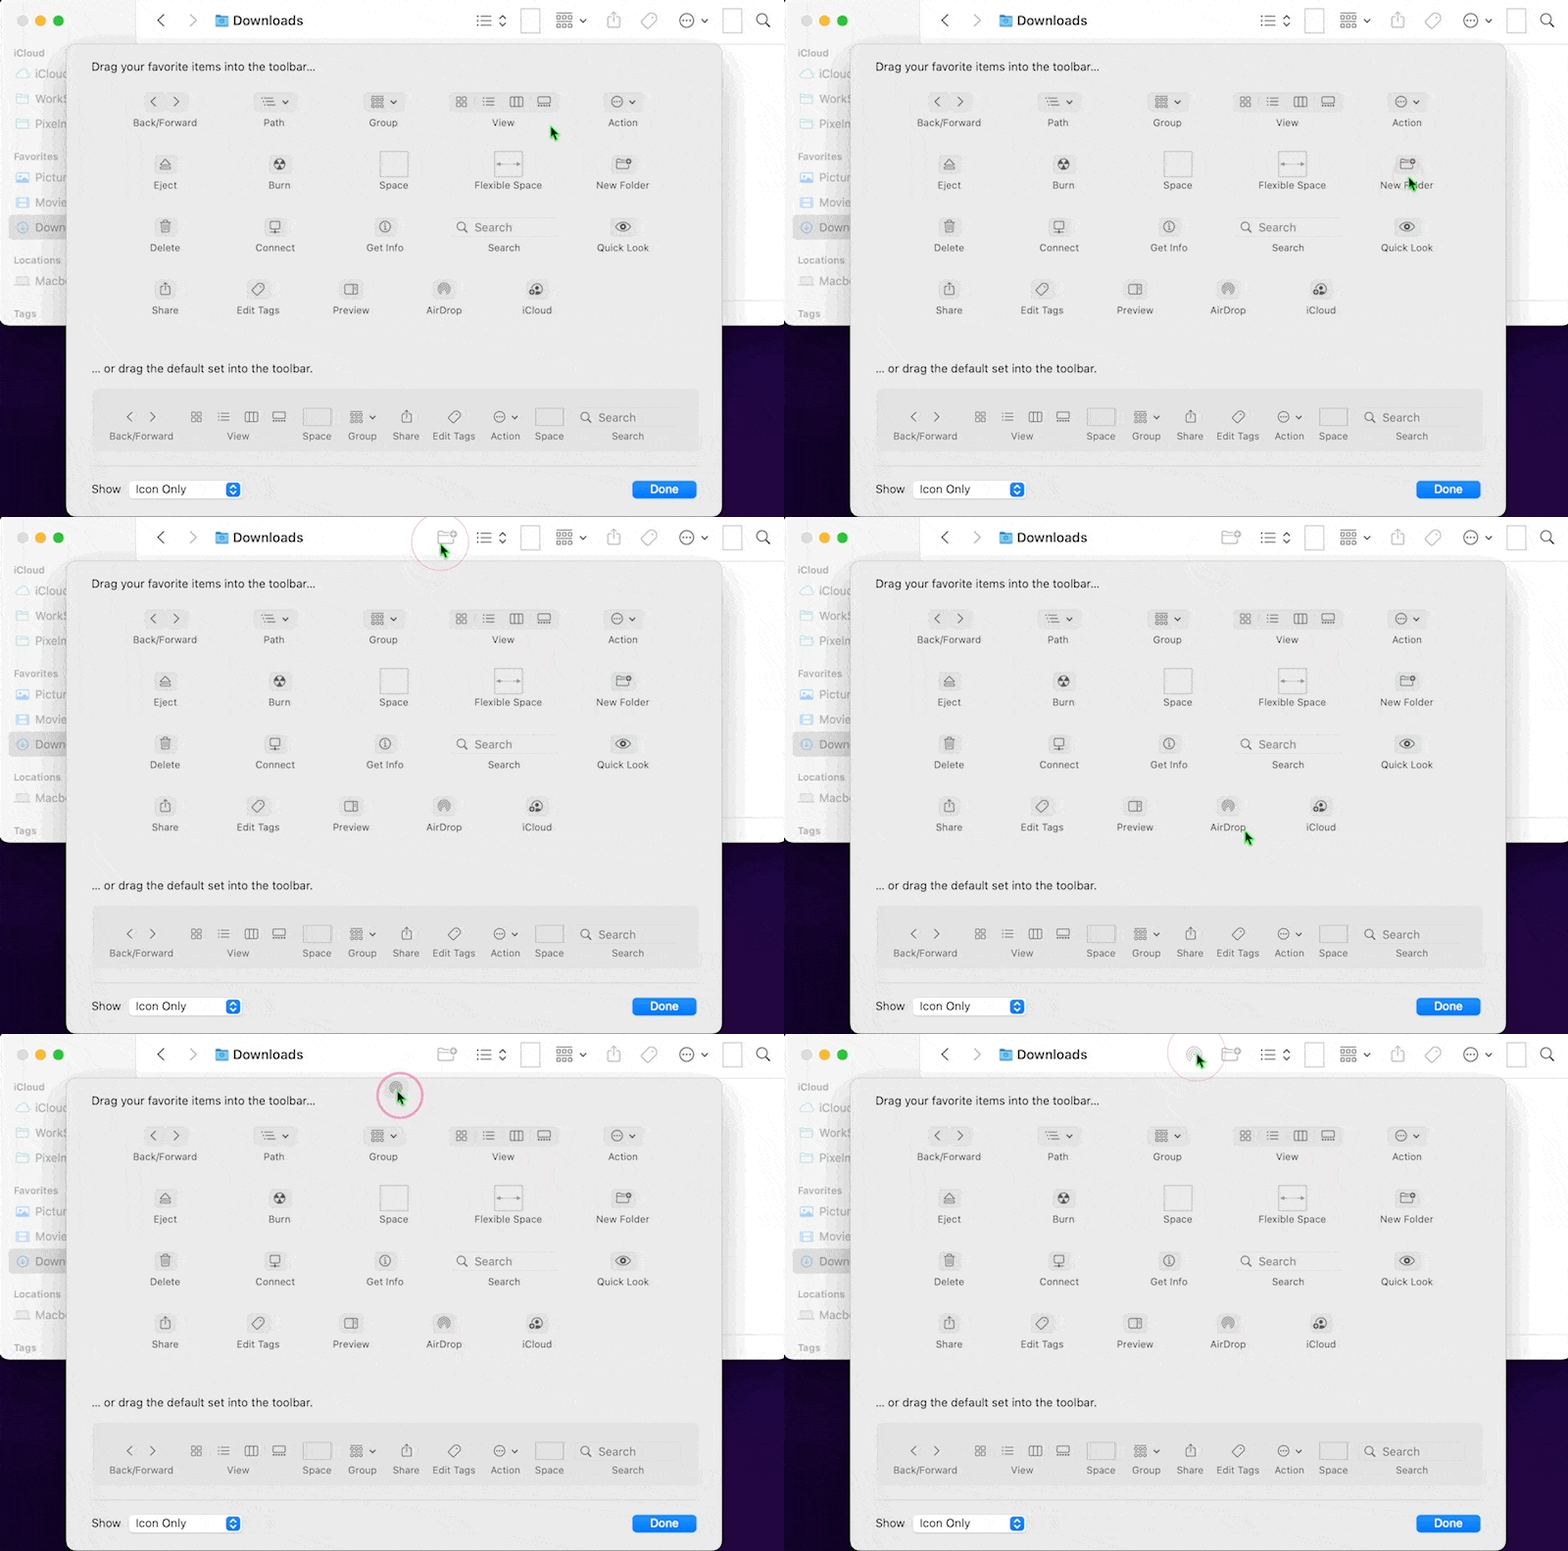
You can add the desired tools to the toolbar by simply dragging and dropping them onto the toolbar.
Removing tools from the toolbar
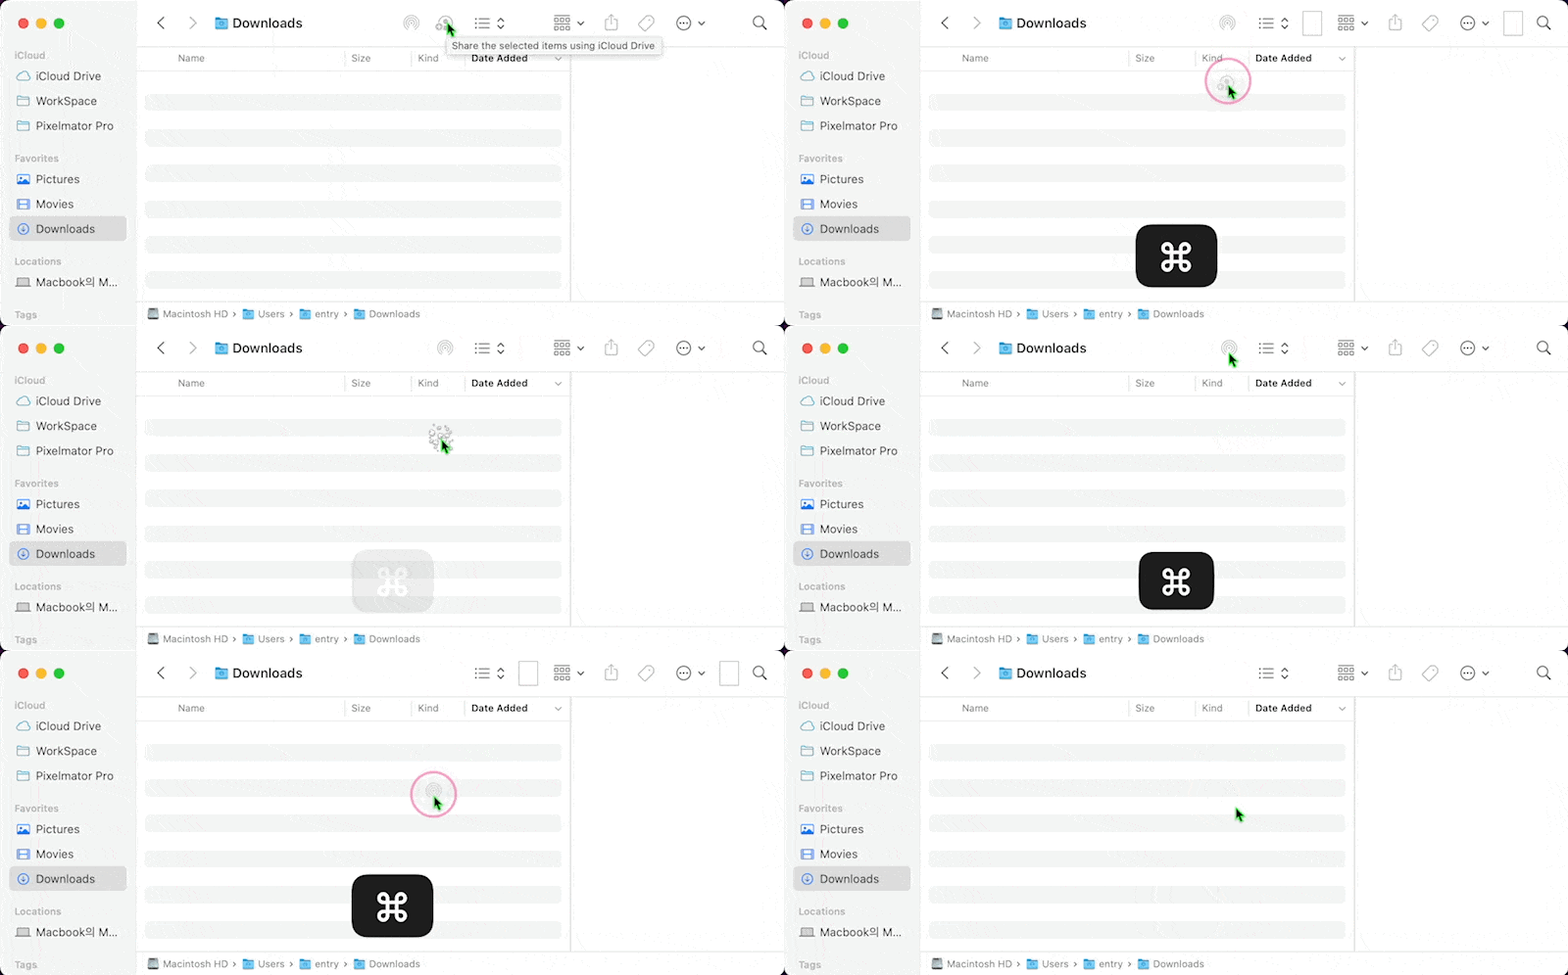
If the toolbar includes tools that you don’t use, you can remove them from the toolbar by using ⌘ + Drag & Drop.
Restoring the Finder toolbar to its default settings
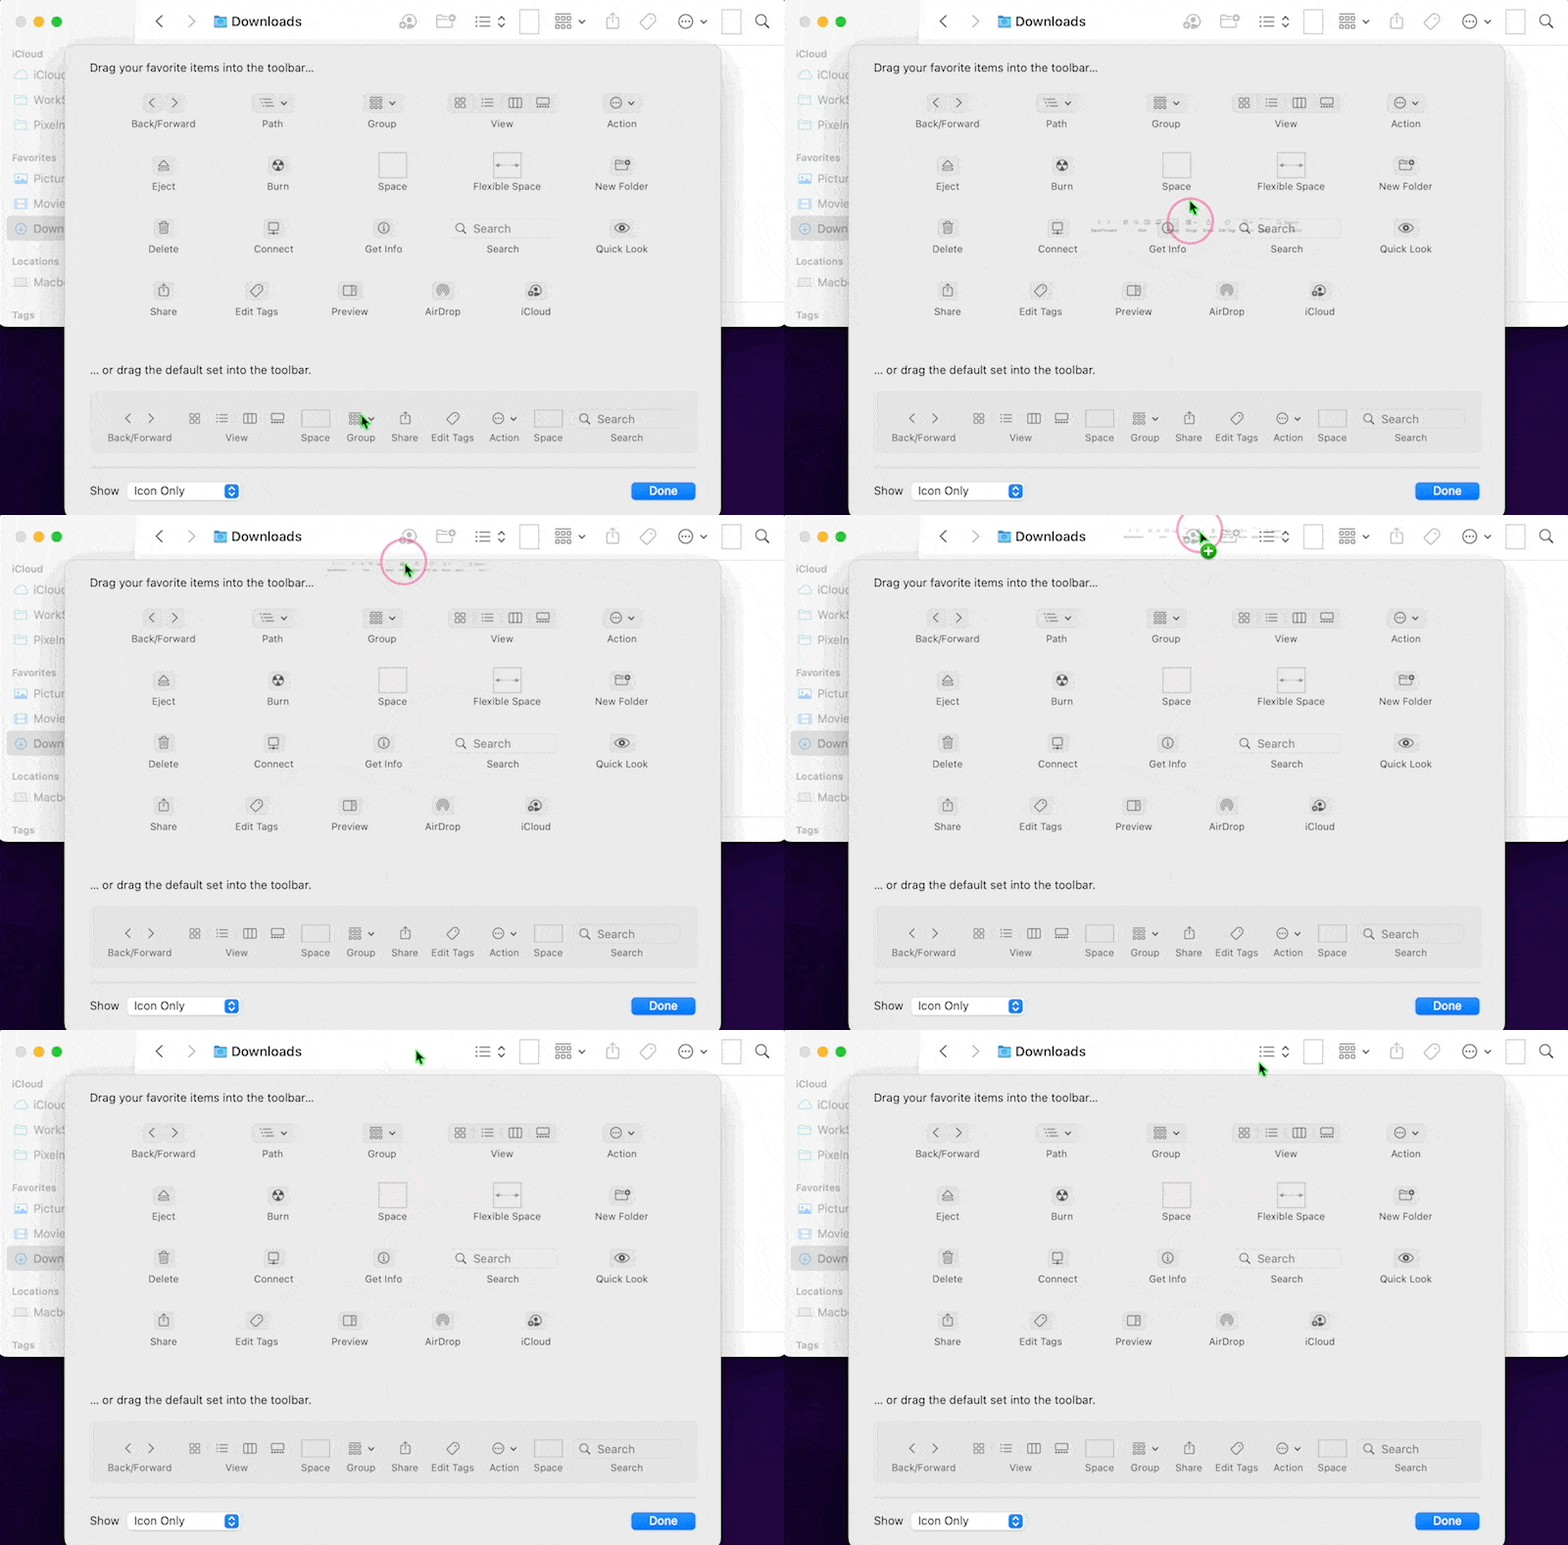
Do you want to rearrange the tools in the toolbar? You can restore the toolbar to its initial state by placing the Default Set of tools in the toolbar.
Using Applications in the Toolbar
In addition to the default tools provided by macOS, you can also add applications, folders, files, and more to the toolbar in Finder.
Adding Applications to the Toolbar
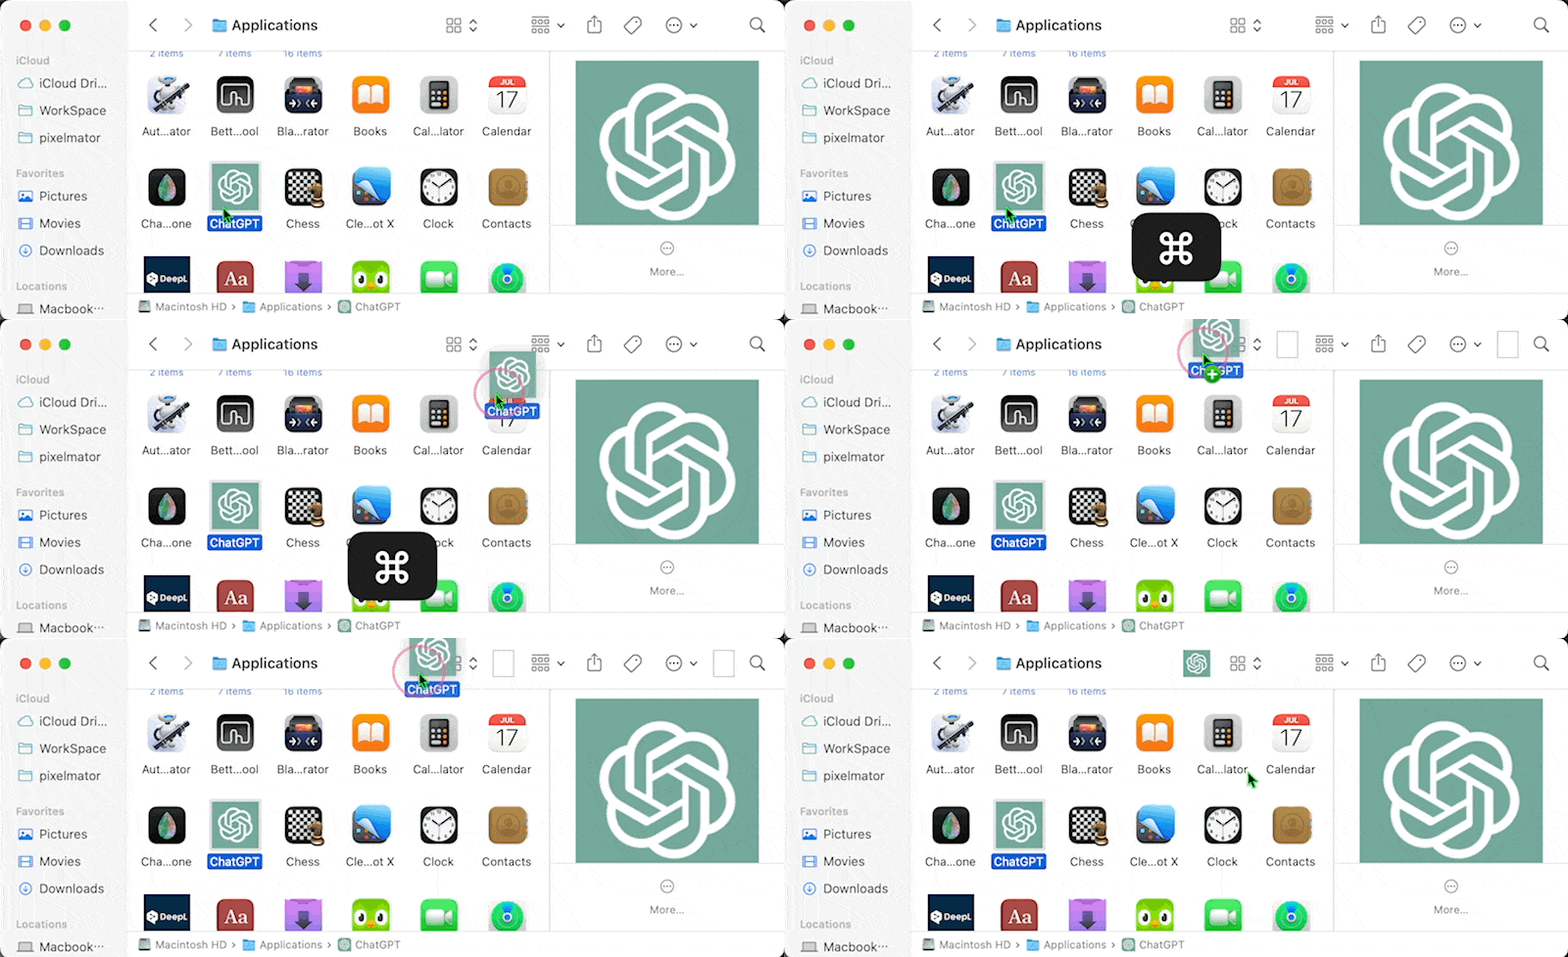
- To add an application to the toolbar, navigate to the Applications folder. You can quickly go to the Applications folder in Finder by pressing the shortcut ⌘ (Command) + ⇧ (Shift) + A.
- Select the application you want to add to the toolbar and drag and drop it onto the toolbar while holding down the ⌘ (Command) key.
- Verify that the application you added to the toolbar launches correctly.
Removing Applications from the Toolbar

To remove an application added to the toolbar, drag and drop it outside of the toolbar while holding down the ⌘ (Command) key.
Interacting with Apps in the Toolbar
Clicking on the applications placed in the toolbar allows you to run the app and interact with specific commands or send files. Let’s see examples.
Opening an Image File directly in Pixelmator Pro
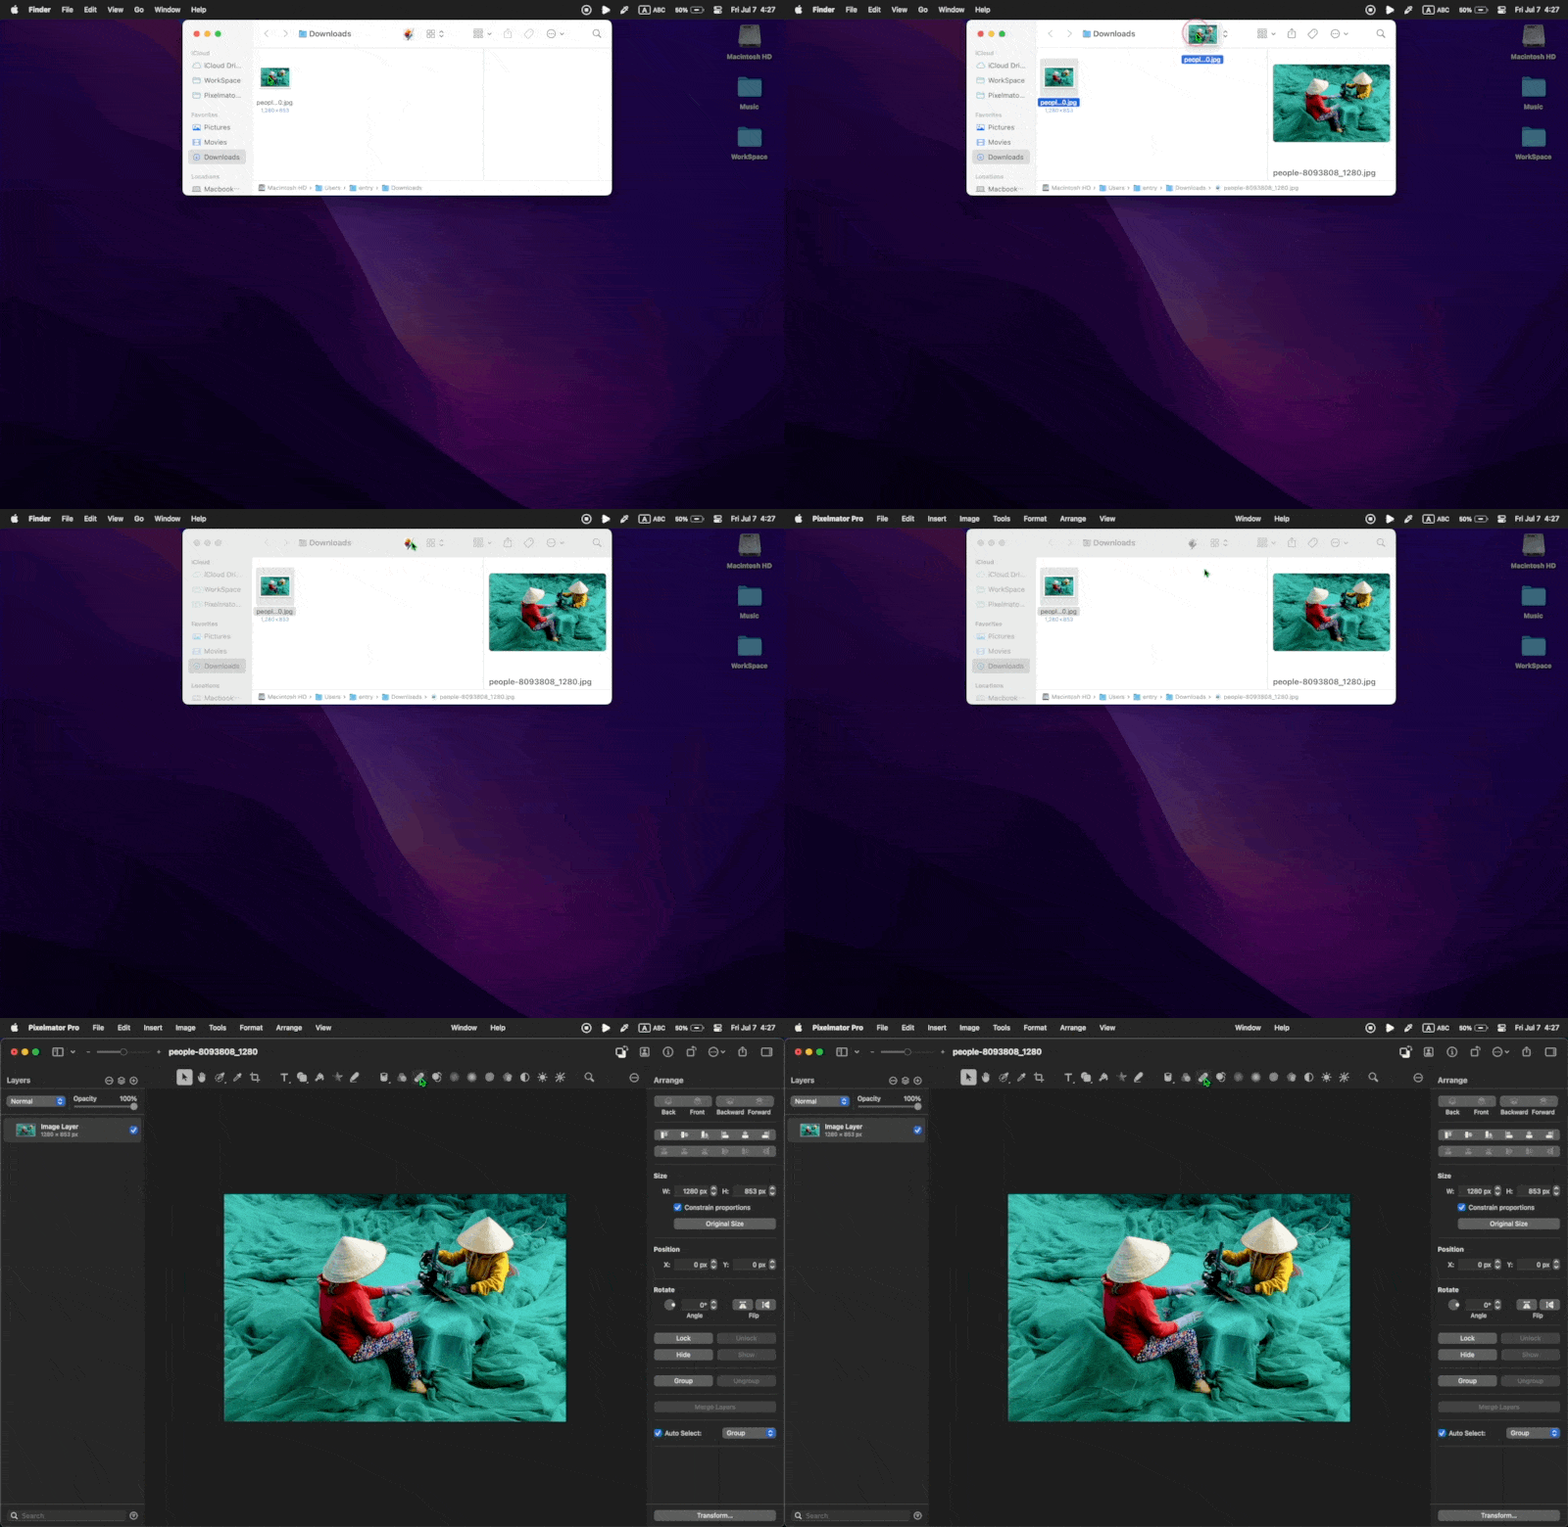
You can drag and drop an image onto the Pixelmator Pro app placed in the toolbar to instantly open it in the editing window.
Opening a YouTube Link directly in Movist Pro
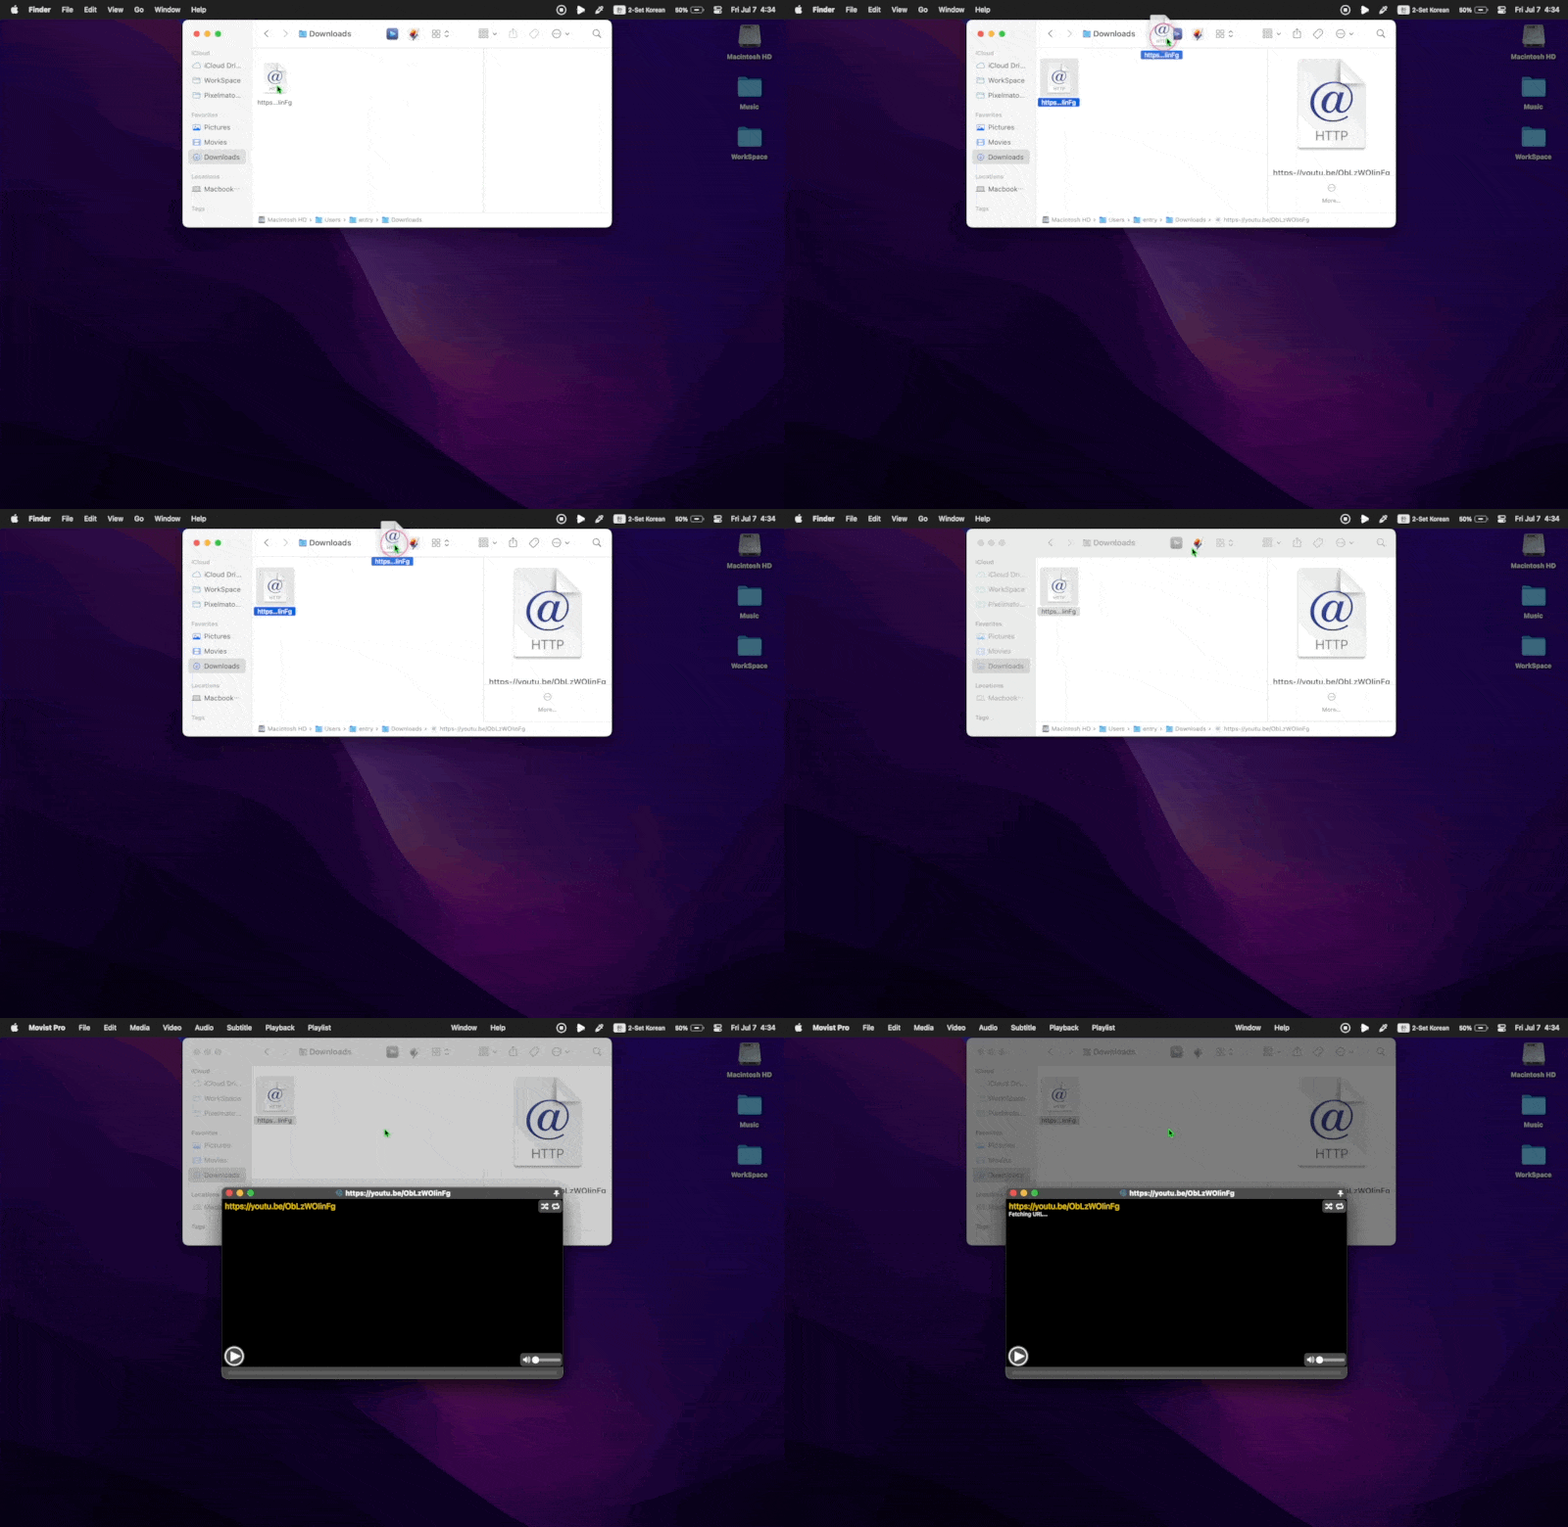
You can drag and drop a web video link file onto the Movist Pro app placed in the toolbar to directly play the web video.
Using the toolbar in macOS Finder app is quite efficient and provides various functionalities. If you haven’t utilized the toolbar yet, try customizing it with your frequently used apps or files.