How to reduce the file size by resizing photos on Mac

When you transfer photos taken with cameras like DSLRs or mirrorless cameras or photos taken with an iPhone to your MacBook, you may sometimes find that the original photos have large file sizes, making it inconvenient to store them on your MacBook for a long time.
Especially when you need to publish the transferred photos on the web or send them to someone else, if you don’t need to send the original photos, it’s recommended to adjust the photo sizes appropriately before sending.
You can resize the photos or reduce their file sizes on macOS without installing third-party apps, using the built-in Preview app or the Photos app.
Resizing Photos in the Preview App
The Preview app, which opens when you double-click an image file, includes simple editing features.
You can use this to resize individual images or resize multiple images at once in the Preview app. Here’s how.
①. Open the photo file in Preview
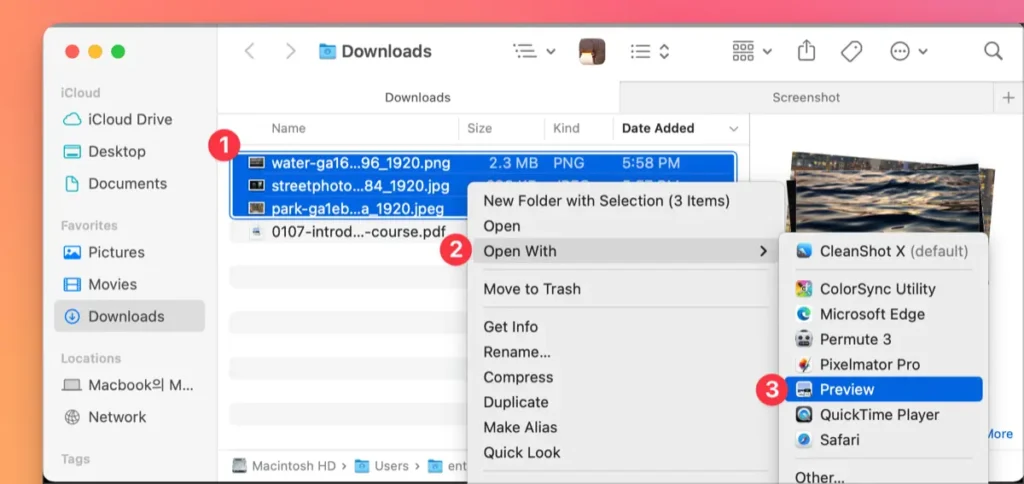
Select the photo file and choose “Open With” > Preview.app
Select the photo file(s) you want to resize in Finder. You can use the Command key to select multiple files or press Command + A to select all files in a folder.
②. Select the Resize option in the Markup toolbar
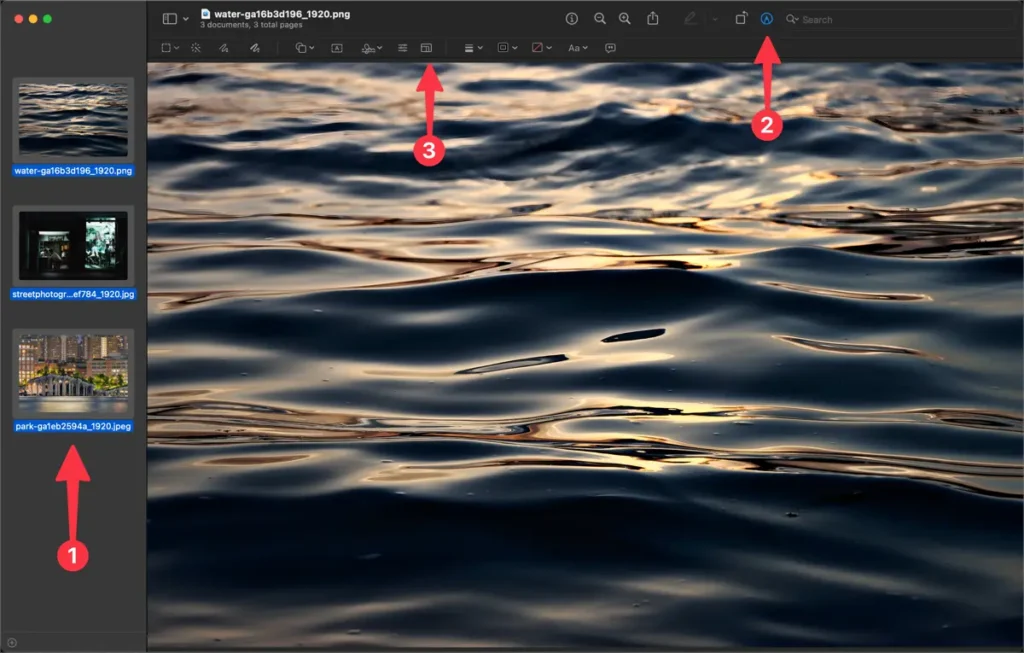
In the Preview window, select all the photos and click on the Resize button in the Markup toolbar.
Click on the image in the Preview window, then press Command + A to select all the photos. Next, click on the Resize icon in the Markup toolbar.
③. Specify the width and height of the photos
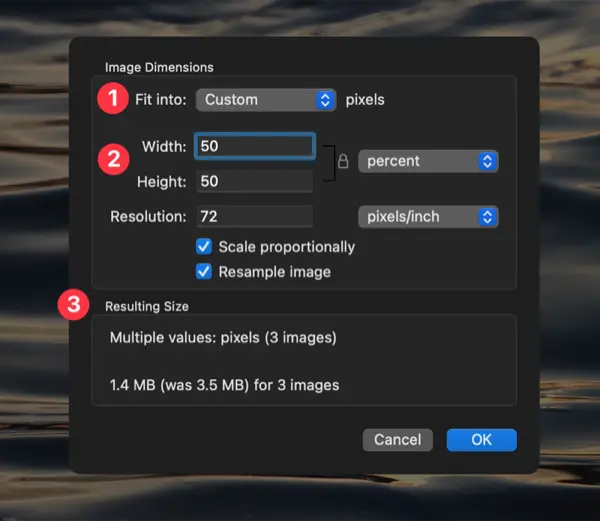
In the image size adjustment window, specify the width and height in pixels or percentage.
In the image size adjustment options, you can choose the default value in pixels or select custom to enter the desired pixel dimensions. Click the OK button to apply the size reduction.
④. Save the edited photos
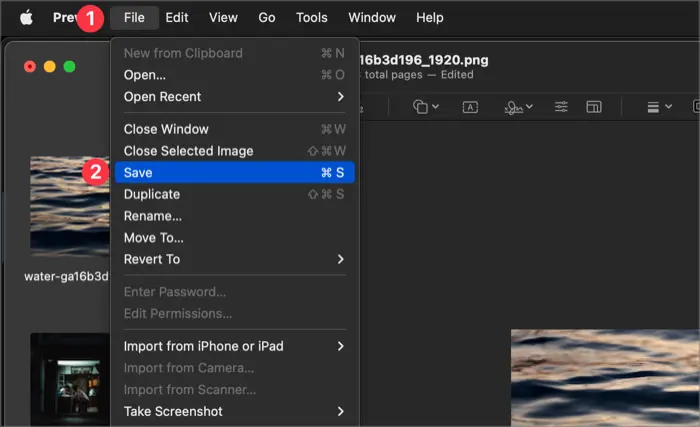
Choose File > Save to save the edited photos.
After resizing the photos, you will see “Edited” displayed at the top of the Preview window. Choose File > Save to save the changes you made. Please note that this will overwrite the original photos, so if you want to keep the original and save the resized photos separately, you can choose File > Duplicate and save them in a different folder.
Reducing Photo Size in the Photos App
While you can use the macOS Preview feature to resize photos, there is an inconvenience when it comes to reducing the image size of RAW files taken with an iPhone Pro or a digital camera. To reduce their size, you need to convert them to TIFF format first.
If you want to convert RAW files to JPG and reduce their file sizes, you can use the Photos app.
①. Importing Files
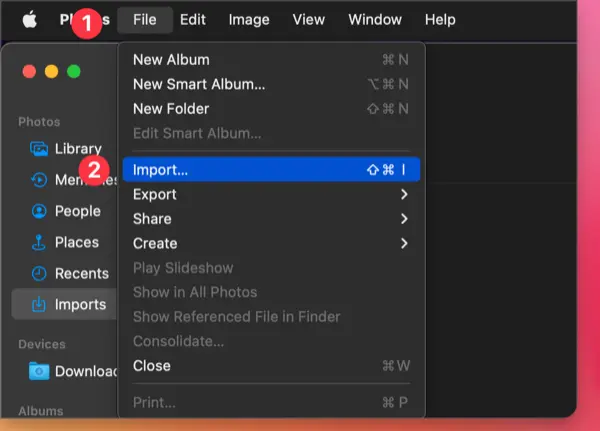
- Open the Photos app and select File > Import.
- Import the photo files you want to resize from Finder.
②. Selecting Photos to Resize

Choose the photos you want to resize from the Library or the imported items. You can select multiple photo files by holding down the Command key or select all imported photos by pressing Command + A.
③. Exporting Photos

In the top menu of the Photos app, select File > Export. You will see the number of selected photos.
④. Resizing images with export options
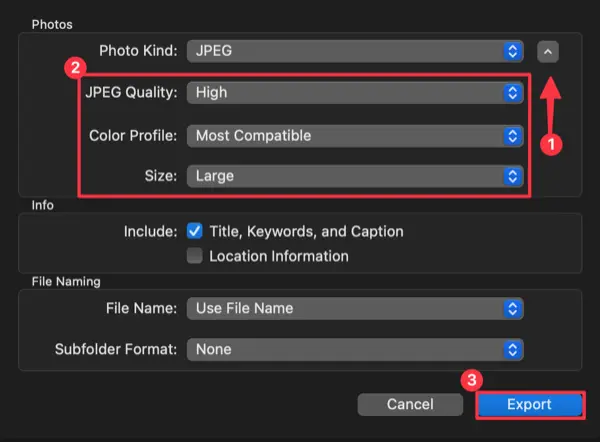
In the export options, choose the photo format (file format), quality, and size. Higher photo quality results in larger file sizes, and you can specify the size based on width or height.
Click the Export button to select the folder where you want to save the resized photos.
With this method, you can modify the size of images on Mac instantly without installing any separate applications or using third-party services. If you need to reduce the file size of images for web use, you can also convert the images to WebP format on Mac. For more detailed information, please refer to the link below.